WWWIP 2019 Week 5: Kyle
Published: 8/1/2019Hi everyone! I'm starting off the new year with some sewing! I managed to sew together most of my outer jacket this last week, and I will be starting on the matching jacket for Madi on tonight's stream.
Have you ever wondered why sleeves are shaped bigger than the armhole they are being sewn into? Well, there's a reason for that, and I would like to show you how to get your sleeves on in a few easy steps!
First, make sure to mark your sleeve appropriately so that you sew it onto the correct side. Most patterns will have small triangles or notches on the sleeve cap that correspond to the armhole.

Set your sewing machine to a wide straight stitch, and carefully sew a line in the seam allowance close to but not quite on your planned seam. Sew a second line in the seam allowance next to the first. Leave one end of the lines loose and untrimmed. This is called an ease stitch.

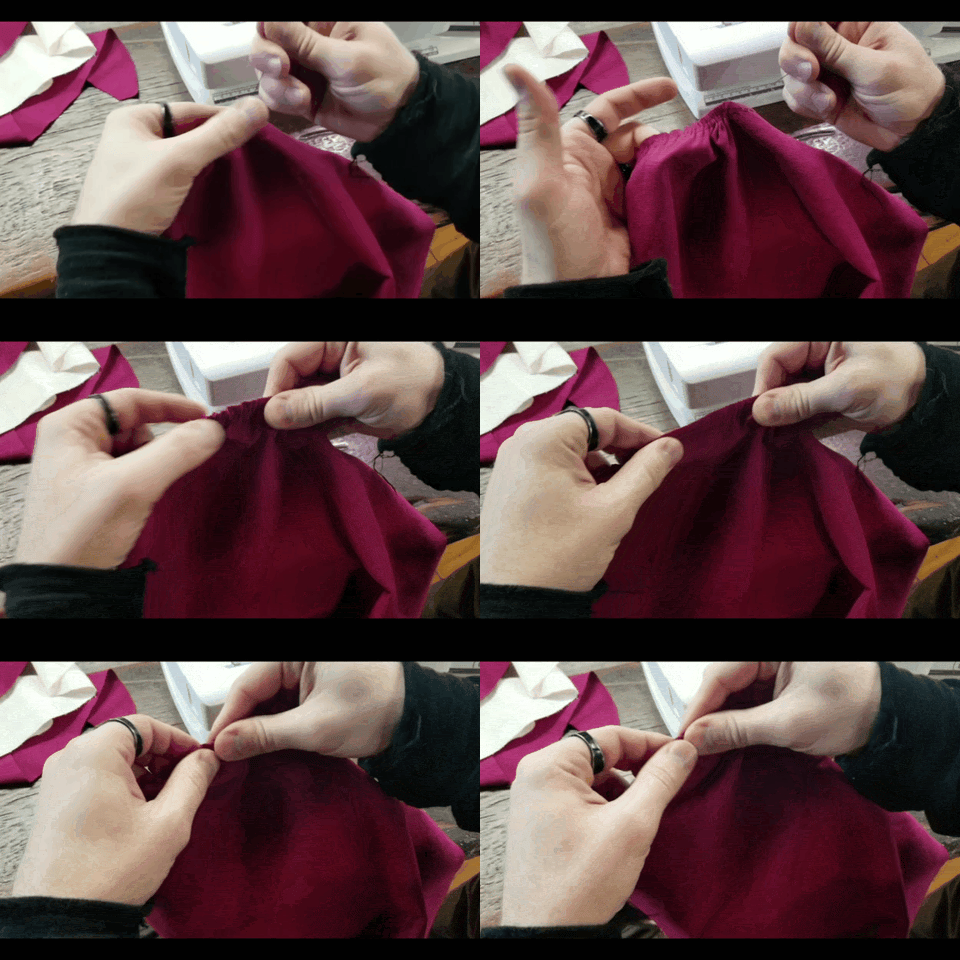
Carefully pull the loose end and "ease" the fabric over towards the tied end. Do this a little bit at a time, and smooth it out as shown in the video. You want your ease stitch to pull your sleeve cap into a slight dome shape, but not tight enough to pucker.


Pin your sleeve to your armhole, starting with the notches and meeting around the top middle of the shoulder cap. Adjust the tightness of your ease stitch off needed to line the seam edges up with each other.

Carefully sew the sleeve on. If your sleeve is a single piece pattern you can leave both your sleeve and jacket base open while sewing together, and stitch the side seams shut afterward. If you have a two-piece sleeve, you will need to sew the sleeve together first, as well as the jacket side seam.

If any puckering exists after stitching, you can carefully seam rip that section and resew. The ease in that area may need to be spread out more to get rid of the puckering.
After sewing your sleeve on, you can use an ironing ham to help hold the shoulder cap shape while flattening the seam edges. If you want to be extra fancy, you can topstitch your seam allowance into place.


-
Chromawing Delta
-
kyle
-
Master Crafter
-
Sewing
-
Sleeves
-
Tutorial
-
Winter Weeky WIP
-
WWWIP2019


